The choice between FLAC and ALAC is less about sound quality and more about your long-term archival strategy; for maximum data integrity, FLAC is the superior choice.
- FLAC’s built-in file integrity checks (checksums) offer a crucial advantage for long-term preservation against data corruption (« bit rot »).
- Modern media servers make the format choice less critical for playback, as they can transcode lossless files to any format on the fly for different devices.
Recommendation: Archive your CD collection in FLAC for its robust, open, and verifiable format. Then, invest in a proper 3-2-1 backup system and a quality DAC for playback.
For the dedicated music collector, the process of digitizing a physical CD library is a rite of passage. It’s a project driven by a desire for convenience, but more importantly, for preservation. The central question that emerges is almost always: FLAC or ALAC? For years, the debate has been framed by simple dichotomies: open-source versus Apple, broad compatibility versus ecosystem integration. While these points were once the whole story, they are now merely the opening chapter. Today, the landscape of digital audio has matured, and so has the discussion.
The truth is, both FLAC (Free Lossless Audio Codec) and ALAC (Apple Lossless Audio Codec) are bit-perfect representations of the original CD audio. They sound identical. The real decision lies not in a sonic-shootout, but in adopting the mindset of a digital archivist. This means shifting focus from the file itself to the entire ecosystem that supports it: storage redundancy, metadata sovereignty, data integrity verification, and the hardware that ultimately translates those digital bits back into sound waves. Modern tools and a deeper understanding of digital preservation have changed the game completely.
This guide moves beyond the surface-level debate. We will explore the practicalities and long-term implications of building a bulletproof digital music archive. The choice of format is a key part of this system, but it’s the system itself that guarantees your collection will outlive the storage media it’s written on. We will treat your collection not as a folder of files, but as a personal archive deserving of a robust, future-proof strategy.
This article provides a comprehensive framework for making the right archival choices. Follow along as we break down the critical components of a resilient digital music library, from calculating storage needs to verifying the health of your files decades from now.
Summary: A Digital Archivist’s Guide to Music Preservation
- Storage Space: How Many Hard Drives Do You Need for 1,000 CDs in FLAC?
- ID3 Tags: How to Ensure Your Car Display Shows the Correct Album Art?
- Lossless vs 320kbps MP3:Low-Latency Protocols for UK Gamers: How to Reduce Ping Under 20ms?
- DACs and Amps: Do You Need External Gear to Play Hi-Res Audio on a Phone?
- Bit Rot: How to Check If Your Music Files Have Corrupted Over 10 Years?
- The « Recently Deleted » Safety Net: How to Recover a File You Erased 29 Days Ago?
- The TBW Limit: How to Check If Your SSD Is Wearing Out?
- Mac Maintenance: How to Keep a MacBook Pro Running Fast After 4 Years?
Storage Space: How Many Hard Drives Do You Need for 1,000 CDs in FLAC?
The first practical question in any digitization project is « How much space will this take? » Understanding the storage footprint is crucial for planning your budget and, more importantly, your backup strategy. A typical CD contains about 650MB of uncompressed audio. FLAC, through its efficient lossless compression, reduces file sizes by roughly 40-60% without discarding any audio data. This means a standard album that is 600 MB in WAV format will typically be around 280-320 MB in FLAC.
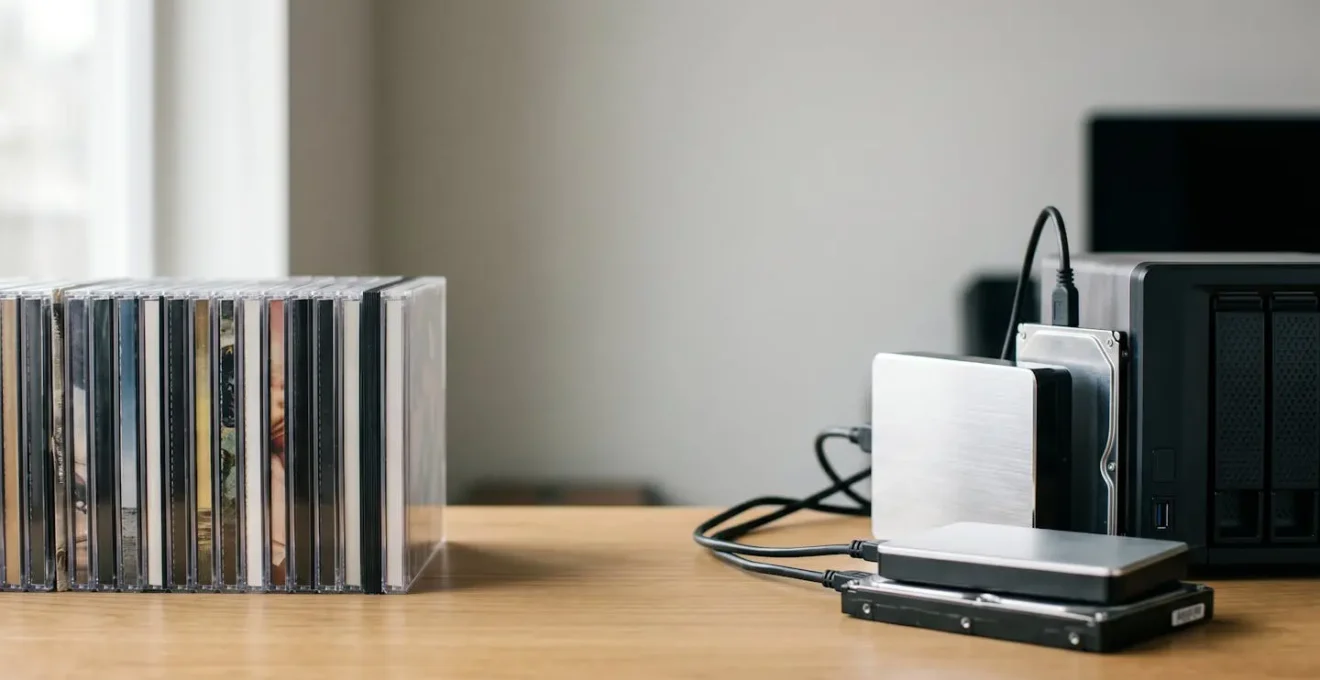
For a collection of 1,000 CDs, the math is straightforward. Real-world archiving projects show that a library of this size will consume approximately 420 GB of storage space. While a single 1TB external hard drive seems like an obvious and affordable solution, a true archivist thinks in terms of redundancy, not just capacity. A single drive is not a backup; it’s a single point of failure. This is where the 3-2-1 backup rule becomes essential: 3 copies of your data, on 2 different types of media, with 1 copy stored off-site.
For your 1,000-CD library, this means you don’t need one 500GB drive; you need at least two, and ideally three, 1TB drives to be safe. This provides space for the initial library, a local backup, and an off-site backup for disaster recovery. For larger or growing collections, investing in a Network Attached Storage (NAS) device with RAID protection automates this redundancy, providing a robust foundation for your archive.
ID3 Tags: How to Ensure Your Car Display Shows the Correct Album Art?
A perfectly ripped, lossless audio file is only half the battle. Without accurate, embedded metadata, your digital archive is little more than a folder of anonymous files. This metadata—album title, artist, track number, and crucially, album art—is what makes your library navigable and enjoyable. The common problem of incorrect or missing album art on a car’s infotainment screen is a symptom of poor metadata management, an issue the digital archivist must solve at the source.
Both FLAC and ALAC have robust systems for handling this information. As explained in technical documentation, this is a key aspect of their design. As one expert from the htcUtils Blog states:
FLAC uses Vorbis Comments and ALAC uses MP4 tags – both robust, standard tagging systems that ensure future portability between ecosystems.
– Complete Guide to Audio Metadata Schemas, htcUtils Blog Technical Documentation
The key to ensuring your metadata is universally recognized is to embed it directly into the audio file. Many people make the mistake of relying on player software to fetch metadata, or they leave album art as a separate `folder.jpg` file in the album directory. This is fragile. Car stereos, new phones, and future software may not see it. By using a dedicated tagging application (like Mp3tag or MusicBrainz Picard) to embed a high-quality, 1000×1000 pixel JPG image into each file, you create a self-contained, sovereign record. This file will carry its « digital passport » with it, ensuring the correct album art and track information appear everywhere, from your car to your phone, for decades to come.
This macro view of the data structure illustrates the concept of layered information within a single file. Your goal as an archivist is to ensure the audio data, text metadata, and image data are all permanently fused together. This practice of metadata sovereignty is a cornerstone of a well-managed archive, protecting your library from the whims of changing software and hardware.
Lossless vs 320kbps MP3:Low-Latency Protocols for UK Gamers: How to Reduce Ping Under 20ms?
The decision to archive in a lossless format like FLAC or ALAC often meets with skepticism: « Can you even hear the difference compared to a high-bitrate MP3? » For archival purposes, this question misses the point. The goal of an archive is to preserve the original source data perfectly, not to create a « good enough » copy. You can always create a smaller, lossy file from a lossless master, but you can never recreate the lost data from an MP3. In controlled tests, most listeners struggle to tell a 320kbps MP3 from a lossless file on consumer gear, but the archivist’s mantra is « store the master, convert for convenience. »
Case Study: On-the-Fly Transcoding with Modern Media Servers
The ‘archive in lossless, transcode for convenience’ strategy is perfectly demonstrated by modern media servers. For example, as highlighted in an analysis of Plex alternatives, platforms like Plexamp allow a user to maintain one pristine FLAC or ALAC archive on their server. When streaming to a phone with limited data or a car stereo with format restrictions, the server automatically converts the file to a smaller, lossy format (like OPUS or MP3) in real-time. This provides the best of both worlds: a perfect master archive at home and a perfectly compatible, lightweight file on the go, all managed from a single source library.
This modern approach makes the old compromises obsolete. You don’t need to maintain separate libraries. You simply build one perfect archive and let software handle the delivery. This pursuit of a perfect, uninterrupted data stream for audio has parallels in other digital domains, such as online gaming. Just as an audiophile seeks to eliminate data loss in a file, a competitive gamer in the UK seeks to eliminate data delay—or latency—in their connection. The goal is to reduce « ping » (the time it takes for data to travel to a server and back) to under 20 milliseconds for a near-instantaneous response.
Achieving this involves a multi-pronged approach. First, using a wired Ethernet connection instead of Wi-Fi is the single most effective step. Second, choosing an Internet Service Provider (ISP) known for its low-latency gaming performance and peering agreements is crucial. Third, optimizing software by closing background applications that consume bandwidth and using Quality of Service (QoS) settings on your router can prioritize game traffic. Finally, connecting to geographically close servers (e.g., London or Amsterdam for UK players) physically shortens the distance data must travel, directly reducing ping. In both high-fidelity audio and competitive gaming, the goal is the same: to ensure the data stream is as clean, complete, and fast as possible.
DACs and Amps: Do You Need External Gear to Play Hi-Res Audio on a Phone?
After meticulously ripping, tagging, and storing your lossless files, a critical question remains: how do you actually listen to them in their full glory? Your phone or computer has a built-in Digital-to-Analog Converter (DAC) and amplifier, but these are typically built to a cost, designed for « good enough » audio with basic earbuds. Playing a perfect lossless file through a mediocre DAC is like serving a gourmet meal on a paper plate. You’re losing all the nuance.
To truly appreciate the quality you’ve preserved, an external DAC is not just a luxury; it’s a necessity. A dedicated DAC bypasses the noisy internal components of your phone or laptop, performing the crucial conversion from digital 1s and 0s to an analog audio wave in a clean, isolated environment. An amplifier then provides the power needed to drive higher-quality headphones, revealing detail, dynamics, and a soundstage that internal hardware simply cannot replicate.
Even a small, portable « dongle DAC » can make a night-and-day difference in audio quality for mobile listening. For a home setup, a desktop DAC/amp combination unlocks the full potential of your archive and your headphones. The choice of hardware has a far greater impact on the final sound you hear than the choice between FLAC and ALAC. Your file format choice is about preservation; your DAC and amp choice is about performance.
The journey into external audio gear can be phased, starting with a simple upgrade and moving towards a dedicated listening station as your appreciation grows, as a recent comparative analysis shows.
| Phase | Equipment Level | Investment Range | Key Benefit | Best For |
|---|---|---|---|---|
| Phase 1 | Built-in phone DAC + wired earbuds/dongle | $0-50 | Baseline lossless playback capability | Starting point to test if you hear differences |
| Phase 2 | Portable USB DAC (e.g., AudioQuest DragonFly Cobalt, Questyle M15i) | $200-330 | Massive quality jump with improved detail and dynamics | Commuters and mobile listeners seeking audiophile sound |
| Phase 3 | Desktop DAC/Amp combo (e.g., Chord Mojo 2, iFi Zen DAC) | $400-700+ | Ultimate home listening with power for demanding headphones | Dedicated home listening sessions and high-impedance headphones |
Bit Rot: How to Check If Your Music Files Have Corrupted Over 10 Years?
The most insidious threat to a digital archive is not fire or theft, but « bit rot »—the slow, silent degradation of data on storage media over time. A single flipped bit in a photo might go unnoticed, but in a compressed audio file, it can result in a loud glitch, a section of silence, or a file that refuses to play at all. This is the archivist’s ultimate nightmare. How can you be sure the files you ripped ten years ago are still bit-perfect today? This is where the choice between FLAC and ALAC becomes critically important.
The FLAC format was designed with archival principles in mind. As technical documentation confirms, every FLAC file embeds a 32-bit MD5 hash of the original, uncompressed audio data within its header. This hash acts as a unique digital fingerprint. You can, at any time, run a simple command to re-calculate the hash from the audio data and compare it to the original stored in the header. If they match, your file is 100% intact. If they don’t, you have detected bit rot. Crucially, ALAC has no equivalent built-in checksum feature. An ALAC file could be slowly corrupting on your drive, and you would have no way of knowing until you tried to play it.
This single feature gives FLAC a monumental advantage for anyone serious about long-term preservation. It transforms the format from a mere container into a self-verifying archival object. Relying on this feature is the cornerstone of any robust integrity strategy.
Action Plan: Two-Layer Archive Integrity Strategy
- Rip Verification: Use tools like dBPoweramp or Exact Audio Copy with AccurateRip during the initial CD ripping. This compares your rip to a database of rips from other people, ensuring the copy is bit-perfect from day one.
- Ongoing Integrity Monitoring: For your FLAC archive, periodically run the format’s built-in test command (`flac -t *.flac`) to verify the MD5 hash and confirm no bit rot has occurred.
- Checksums for ALAC: If you use ALAC, you must manually create and maintain an external checksum manifest (e.g., using `sha256sum`) for your files and verify them periodically.
- Advanced Protection (PAR2): For mission-critical archives, create PAR2 parity files. These not only detect corruption but provide redundant data that can be used to repair damaged files.
- Robust File System: Store your archive on a modern, robust file system like ZFS (common in NAS devices), which provides its own layers of data integrity checking to prevent bit rot at the hardware level.
The « Recently Deleted » Safety Net: How to Recover a File You Erased 29 Days Ago?
In the digital world, a slip of the finger can lead to a moment of panic. Deleting a file, an album, or even an entire folder of your precious music archive can feel catastrophic. Most modern operating systems—from macOS and Windows to mobile platforms like iOS and Android—offer a built-in safety net: the « Recently Deleted » folder, Trash, or Recycle Bin. This feature acts as a temporary holding pen for erased files, giving you a grace period to reconsider your decision.
Typically, these systems hold deleted files for a set period, often 30 days. If you realize you’ve made a mistake within this window, recovery is simple. You navigate to the Trash/Recycle Bin, find the file, and choose the « Restore » or « Put Back » option. The file will be returned to its original location, metadata and all, as if nothing ever happened. On day 29, this process is just as easy as it is on day 1. However, on day 31, the file is often permanently erased to free up space, and this simple recovery method is lost forever.
From an archivist’s perspective, this feature is a welcome convenience for correcting minor, immediate errors. However, it should never be considered part of a backup strategy. It is a fragile, temporary buffer, not a robust recovery solution. It offers no protection against hard drive failure, software corruption, ransomware, or any of the major threats that a true 3-2-1 backup strategy is designed to mitigate. Relying on the « Recently Deleted » folder is like having a fire extinguisher but no smoke detectors or insurance policy. It’s useful in one very specific, limited scenario, but it leaves you completely exposed to larger disasters.
The TBW Limit: How to Check If Your SSD Is Wearing Out?
Choosing the right storage media for your archive is as important as choosing the right file format. While traditional Hard Disk Drives (HDDs) offer massive capacity for a low cost and are ideal for bulk « cold » storage, many archivists use Solid-State Drives (SSDs) for their « hot » or primary working library due to their incredible speed. However, SSDs have a finite lifespan, a concept measured by the TBW (Terabytes Written) limit.
Unlike HDDs, which can mechanically fail, SSDs wear out electronically. Every time you write data to a memory cell, it undergoes a small amount of degradation. The TBW rating is the manufacturer’s guarantee for how many terabytes of data you can write to the drive before the cells may begin to fail and become unreliable. A modern 1TB consumer SSD might have a TBW rating of 600, meaning you can write 600 terabytes of data before it’s considered to have reached the end of its warrantied life. For a music library that is mostly read from and rarely written to, you are unlikely to ever hit this limit. However, if the SSD is also your main system drive, with constant temporary file writes, the TBW can accumulate faster.
Checking the health of your SSD is a crucial part of an archivist’s maintenance routine. Fortunately, drives track this data themselves through a system called S.M.A.R.T. (Self-Monitoring, Analysis, and Reporting Technology). You can access this data easily:
- On Windows: Use a free utility like CrystalDiskInfo. It will show you a « Health Status » percentage and the « Total Host Writes » or « Data Units Written, » which you can compare to your drive’s TBW rating.
- On macOS: Go to System Information > Hardware > Storage. Select your drive and check the « S.M.A.R.T. Status. » For more detail, third-party apps like DriveDx are excellent.
Monitoring your SSD’s health doesn’t prevent failure, but it gives you an early warning. If you see the health percentage dropping or the total terabytes written approaching the drive’s limit, it’s a clear signal to replace the drive and restore your library from a backup, long before any data is actually lost.
Key Takeaways
- Archive your masters in a lossless format, preferably FLAC for its built-in integrity checking features that protect against « bit rot. »
- Implement a robust 3-2-1 backup strategy (3 copies, 2 media types, 1 off-site) to protect your collection from any single point of failure.
- The biggest bottleneck to audio quality is not your file format but your playback hardware; invest in a quality external DAC and amplifier.
Mac Maintenance: How to Keep a MacBook Pro Running Fast After 4 Years?
Your digital music archive doesn’t exist in a vacuum. It lives on, and is managed by, a computer. The reliability and performance of that computer—the archivist’s workstation—is a critical component of your preservation strategy. A slow, cluttered, or unreliable machine makes managing a large library a chore and increases the risk of errors during critical tasks like ripping, tagging, or transferring files. Keeping a MacBook Pro, or any computer, running smoothly after several years requires proactive maintenance.
First, manage your storage. A drive that is more than 85% full will cause macOS to slow down significantly as it struggles to find contiguous space for files and virtual memory. Use the « Storage Management » tool (About This Mac > Storage > Manage…) to identify and clear out large files, old iOS backups, and system junk. Regularly emptying the Trash and clearing application caches is also essential.
Second, monitor your system resources. The Activity Monitor (found in Applications/Utilities) is your best friend. Use it to check the CPU and Memory tabs to identify any runaway processes or applications that are consuming an inordinate amount of resources. A misbehaving app can bring the entire system to a crawl. Third, keep your software up to date. This includes not just macOS itself, but all your applications. Updates often include performance optimizations and security patches that keep the system running smoothly and safely. Finally, a simple restart once a week can resolve many minor performance issues by clearing out temporary files and resetting memory.
A well-maintained MacBook Pro is not just faster to use; it’s a more stable and reliable tool for curating your digital archive. By treating your computer with the same methodical care as your music files, you ensure the entire ecosystem, from the ripping software to the backup drive, is working in harmony. This holistic approach is the mark of a true digital archivist.
Begin building your archival system today by choosing the right tools and adopting a preservation mindset. Your future self will thank you for the care and foresight you invest now.